Get started
Create a new project
Start by creating a new folder for your project
mkdir myproject && cd myproject
then run the following command to to start a the scaffolding process.
npx @subzerocloud/scaffold@latest new
The scaffolding package also has a "demo" mode that you can use to quickly try out all the functionality directly with your own data/database. You can run it like this:
npx @subzerocloud/scaffold@latest demo
During the scaffolding process you will be asked a few questions
? How would you like to provide your database schema (Use arrow keys)
❯ Create a blank database
  Use a predefined sample schema (with sample data)
  Provide a SQL script defining the schema
  Enter a database connection string
? Which type of database would you like to use? (Use arrow keys)
❯ SQLite
  PostgreSQL
Although the scaffolding package does not provide the option for other databases besides PostgreSQL and SQLite for now, the underlying libraries (REST) already supports PostgreSQL, SQLite, MySQL, Clickhouse (and all their variants) and we will add support for them in the scaffolding package soon.
In the end the entire process should look like this:
➜  Projects mkdir myproject && cd myproject
➜  myproject npx @subzerocloud/scaffold@latest new
? How would you like to provide your database schema? Blank
? Which type of database would you like to create? PostgreSQL
   create package.json
   create .dockerignore
   create .env
   create Dockerfile
   create db/include/auth.sql
   create db/include/data.sql
   create db/include/permissions.sql
   create db/include/roles.sql
   create db/include/schema.sql
   create db/init.sql
   create docker-compose.yml
   create esbuild.mjs
   create favicon.ico
   create index.html
   create postcss.config.js
   create src/App.tsx
   create src/components/Dashboard.tsx
   create src/index.tsx
   create src/server.ts
   create src/styles.css
   create src/vite-env.d.ts
   create tailwind.config.js
   create tsconfig.json
   create vite.config.ts
   create vite.subzero.ts

Project created successfully!

Next steps:
  1. npm install
  2. npm run dev
  3. Open a browser window (hit the 'o' key in the terminal)
  4. Login with the following credentials (defined in .env):
     Username: admin@demo.com
     Password: demo
  5. Enjoy!
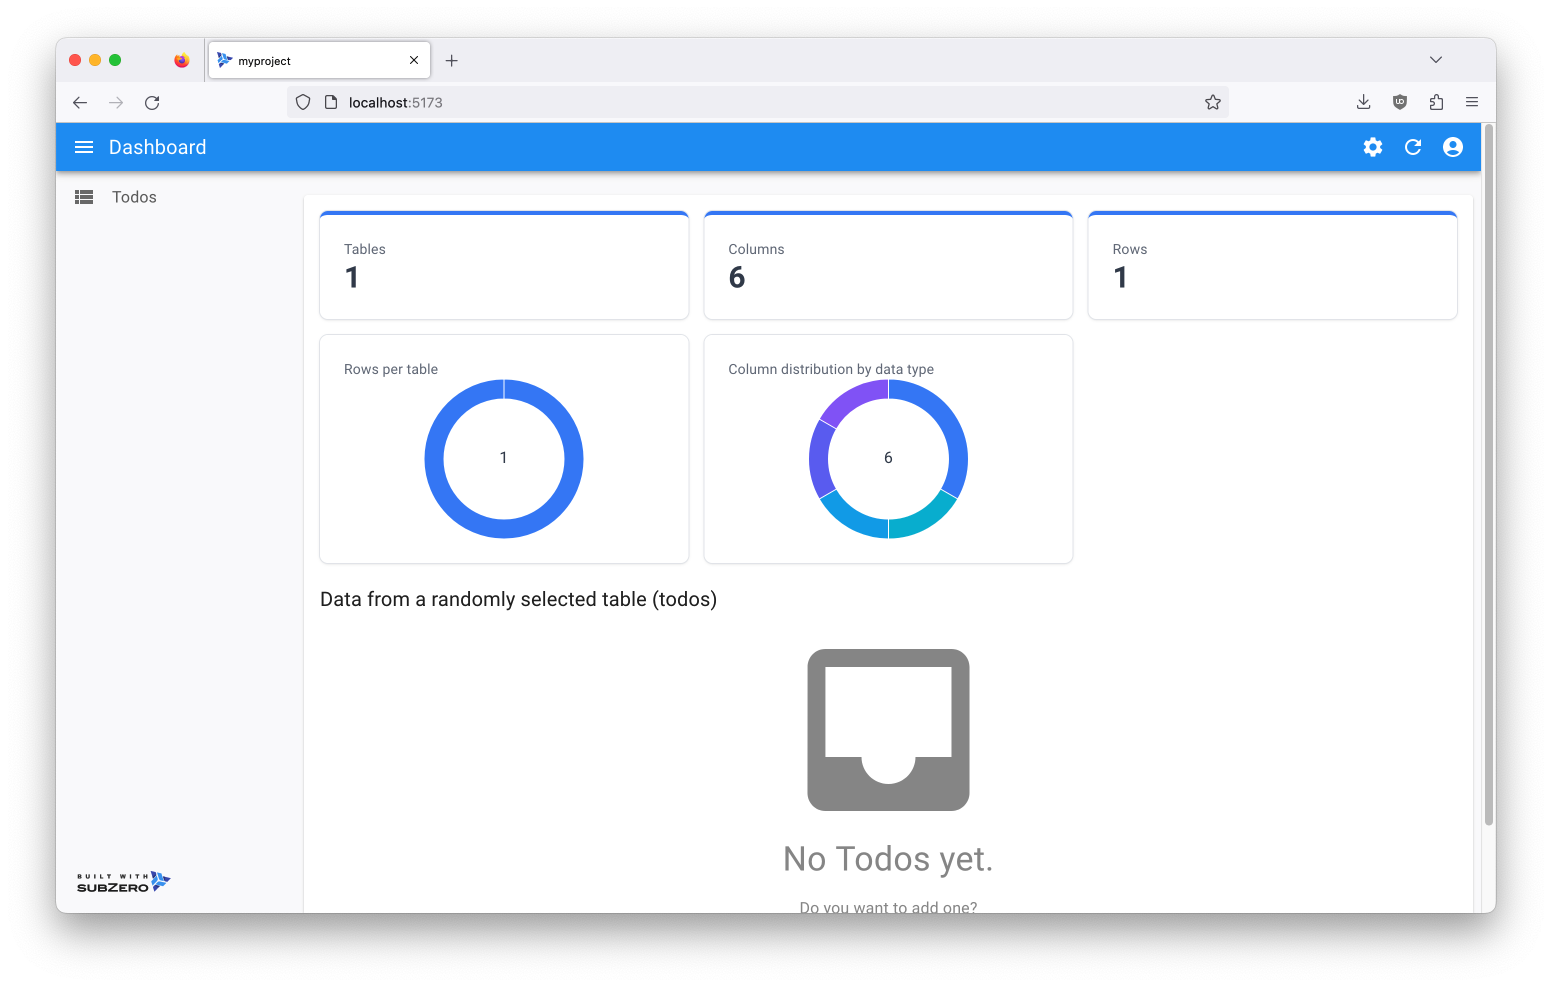
Execute the steps above and you should see the following screen in your browser:
Most of the files generated are configuration files for the various tools used in the project (Vite, Tailwind, PostCSS, etc.) and you can safely ignore them for now.
Here are the files that implement the actual functionality:
 - db/             # Contains the database schema and sample data
 - src/App.tsx     # The main React component (frontend UI)
 - src/server.ts   # The express server (backend API)
Take 5 minutes to look at the code in these files and then continue to the next section to learn how to customize the project.